The Magic of Meringue Cookies: A Sweet, Weightless Delight
Imagine biting into a delicate, airy confection that dissolves on your tongue like a sweet whisper, leaving behind a subtle crunch and a burst of flavour. That, our friends, is the enchanting experience of Perfect Meringue Cookies: Your Easy Guide to Light & Crispy Bites. These delightful treats, often described as "sugar clouds" or "light-as-air kisses," are not just cookies; they're tiny moments of culinary magic. Visually stunning, especially when piped into elegant shapes and tinted with a hint of colour, they add an exquisite touch to any dessert spread, holiday cookie tray, or afternoon tea.
Meringue cookies are remarkably simple in their core ingredients – just egg whites and sugar – yet they possess an elegant complexity in texture and presentation. Often referred to as forgotten cookies because they bake at an incredibly low temperature for an extended period (sometimes even left in the turned-off oven overnight), they truly are a testament to the idea that sometimes the simplest things yield the most impressive results. Naturally gluten-free and endlessly customizable, they offer a delicate melt-in-your-mouth finish that belies their humble origins, making them a perfect treat for any occasion, from casual coffee breaks to sophisticated gatherings.
Mastering the Meringue: Key Ingredients & What Makes Them Work
The beauty of Classic Meringue Cookies: Low-Temp Baking for Perfect Crispness lies in their minimal ingredient list. However, understanding the role of each component is crucial for achieving that signature crisp, feather-light texture. While the concept of whipping egg whites and sugar seems straightforward, a little science and precision go a long way.
The Humble Egg White: The Star of the Show
Egg whites are undeniably the foundation of any successful meringue. Their unique protein structure allows them to trap air when whipped, creating volume and stability. For best results, always use:
- Fresh Egg Whites: Not the liquid kind from a carton. Fresh eggs provide superior stability and volume.
- Room Temperature Eggs: While some debate exists, many bakers find that egg whites separate more easily and whip to a greater volume when at room temperature. Let them sit out for 30 minutes to an hour before use.
- A Fat-Free Environment: This is paramount! Even a speck of egg yolk, grease from your hands, or residue on your bowl or whisk can prevent the egg whites from whipping properly. Ensure all equipment is impeccably clean and dry. Stainless steel or glass bowls are preferred over plastic, which can retain grease.
Sugar's Role: Structure and Sweetness
Sugar does more than just sweeten your meringue; it stabilizes the whipped egg whites, creating a glossy, stable foam. The type and addition method matter significantly:
- Granulated Sugar (Caster Sugar): Finer granulated sugar (sometimes called caster sugar) is ideal as it dissolves more readily into the egg whites, preventing a gritty texture.
- Gradual Addition: Never dump all the sugar in at once. Add it slowly, a tablespoon at a time, once the egg whites have reached soft peaks. This allows the sugar to dissolve completely and integrate into the protein structure, creating a strong, stable meringue.
Beyond Eggs & Sugar: Essential Additions
While eggs and sugar are the core, a few other ingredients can elevate your Perfect Meringue Cookies: Your Easy Guide to Light & Crispy Bites:
- Acid (Cream of Tartar, Lemon Juice, or White Vinegar): A tiny amount of acid helps stabilize the egg whites, strengthens their structure, and prevents over-whipping. About ¼ teaspoon per 3-4 egg whites is sufficient.
- Vanilla Extract: The classic flavouring that complements the sweetness beautifully. Add it towards the end of whipping for best results.
- Pinch of Salt: A tiny pinch can help balance the sweetness and enhance other flavours.
The Art of Baking Meringue Cookies: Low and Slow is the Way to Go
Making Classic Meringue Cookies: Low-Temp Baking for Perfect Crispness is less about traditional "baking" and more about "drying out." This distinction is key to their signature crisp, melt-in-your-mouth texture.
The Whipping Process: From Foamy to Stiff Peaks
The journey from liquid egg whites to a glorious meringue is fascinating:
- Start Slow: Begin whipping egg whites on low speed until they are foamy and frothy.
- Increase Speed: Gradually increase the speed to medium-high.
- Add Acid: Once soft peaks begin to form (the meringue holds its shape but the tip flops over), add your acid.
- Gradually Add Sugar: Continue whipping on medium-high, adding the sugar a tablespoon at a time, allowing each addition to dissolve before adding the next.
- Achieve Stiff, Glossy Peaks: Continue whipping until the meringue is thick, glossy, and holds stiff peaks when you lift the whisk. The peaks should stand straight up and not droop. You should also be able to rub a tiny bit between your fingers and feel no grit from undissolved sugar. This is the perfect consistency for piping beautiful Perfect Meringue Cookies: Your Easy Guide to Light & Crispy Bites.
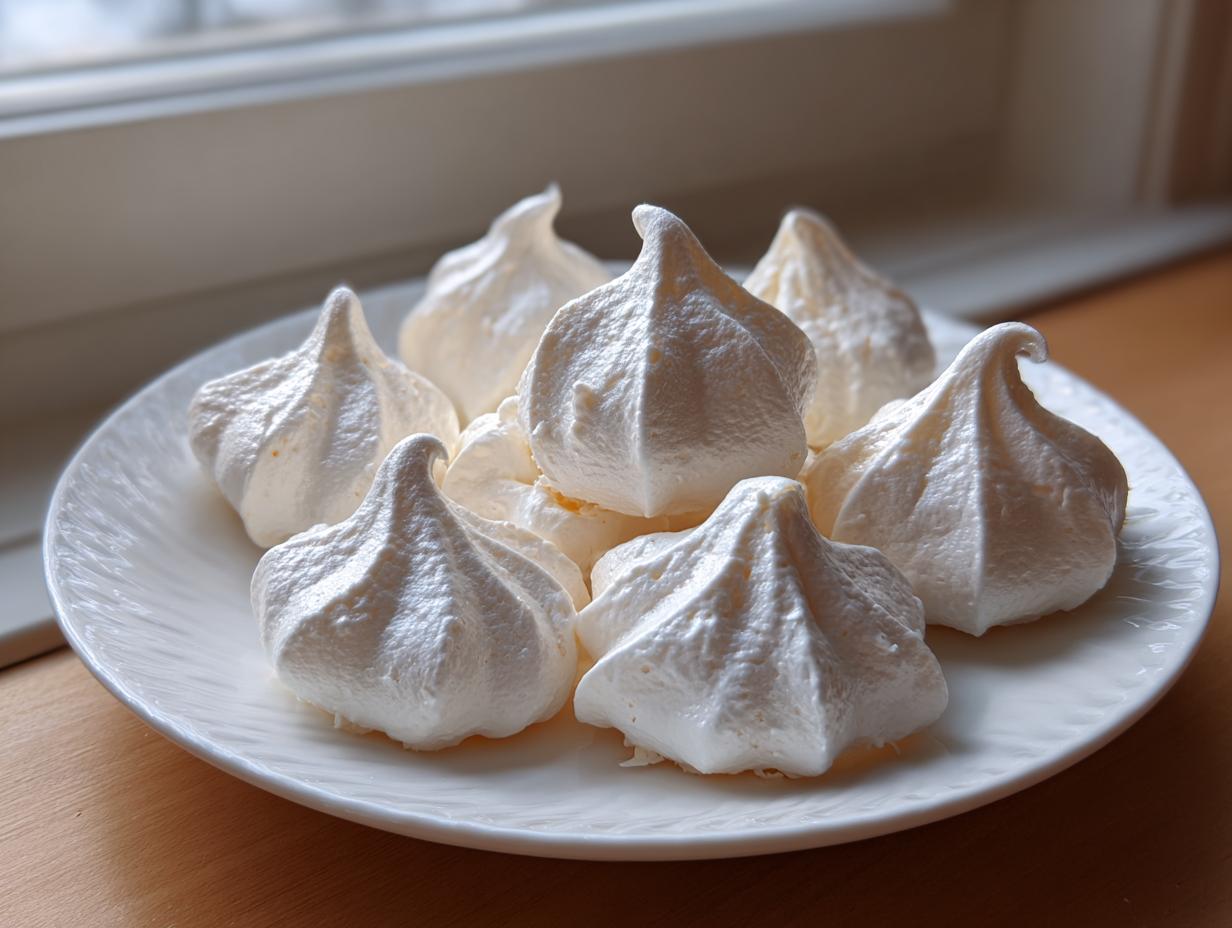
Piping Perfection: Shaping Your Sweet Kisses
Once your meringue is ready, it's time to pipe! A piping bag fitted with a star tip (like a 1M or 2D) or a round tip is perfect for creating classic meringue kisses or rosettes. Pipe uniform shapes onto parchment-lined baking sheets, leaving a little space between each cookie. Consistency in size ensures even drying.
The "Drying Out" Bake: Low Temperature, Long Duration
This is where the magic happens for Classic Meringue Cookies: Low-Temp Baking for Perfect Crispness. Unlike traditional cookies, meringues are baked at a very low temperature (typically 200°F / 95°C) for an extended period. This gentle heat slowly evaporates the moisture from the egg whites without browning them, resulting in a perfectly crisp, dry, and white cookie all the way through. Baking times can range from 1 to 2 hours, depending on the size of your cookies.
Pro Tip: After the baking time is complete, turn off your oven and leave the meringue cookies inside, with the oven door slightly ajar, until they are completely cool. This crucial step helps prevent cracking and ensures maximum crispness by slowly releasing any remaining moisture.
Cooling & Storage for Optimal Crispness
Once fully cooled, your meringue cookies should be crisp and easily lift from the parchment paper. Store them immediately in an airtight container at room temperature. Humidity is the arch-nemesis of meringue cookies, causing them to become sticky and chewy. If properly stored, they can last for several weeks, making them excellent make-ahead treats or gifts.
Flavour, Colour, & Creativity: Elevating Your Meringue Masterpiece
While classic vanilla meringue cookies are delightful, there's ample room for creativity. With just a few simple additions, you can transform these simple treats into a vibrant array of flavours and colours.
Infusing Flavour
- Extracts: Beyond vanilla, try almond, peppermint, lemon, orange, or even coconut extract. Add extracts towards the end of the whipping process to preserve their delicate aromas.
- Zest: Finely grated lemon or orange zest can add a bright, fresh dimension. Fold it in gently after the meringue is fully whipped.
- Cocoa Powder: For a chocolatey twist, gently sift in a tablespoon or two of unsweetened cocoa powder at the very end. Be aware that cocoa can slightly affect the meringue's texture, making it a little less crisp.
Adding a Pop of Colour
Transform your meringue cookies with vibrant hues. Gel food colouring is highly recommended over liquid food colouring, as it's more concentrated and won't add excess moisture, which can destabilize the meringue. Add a tiny dab of gel colour to the meringue at the very end of whipping, or for a beautiful marbled effect, paint vertical stripes of gel colour inside your piping bag before filling it with meringue.
Exciting Mix-ins
For an extra layer of texture and taste, consider gentle mix-ins:
- Mini Chocolate Chips: Fold in gently with a spatula after the meringue is fully whipped.
- Sprinkles: Add a festive touch by folding in sprinkles or dusting them on top before baking.
- Crushed Nuts: Finely crushed pistachios, pecans, or almonds can add a lovely subtle flavour and crunch.
Troubleshooting Common Meringue Mistakes & Ensuring Success
Even experienced bakers can encounter meringue mishaps. Don't be discouraged! Understanding common issues can help you diagnose and prevent them in the future.
Weeping Meringue
If your meringue cookies appear to be "sweating" or have beads of sugary liquid on them, it's often due to:
- Too Much Moisture: High humidity in your kitchen.
- Undissolved Sugar: Not enough time was given for the sugar to fully dissolve.
- Under-baked: The cookies didn't dry out sufficiently.
Sticky or Chewy Meringue (When a Crispy Texture is Desired)
This is usually a sign that your cookies haven't been baked or dried long enough, or that humidity has gotten to them. Solution: Always cool completely in the oven, and store immediately in an airtight container.
Flat Meringue
If your meringue fails to hold its height and spreads, the most common culprits are:
- Fat Contamination: Even a tiny speck of grease can ruin the meringue's structure.
- Under-whipped Egg Whites: Not reaching stiff peaks.
- Over-mixing After Sugar: While you need to whip to stiff peaks, excessive whipping beyond that point can cause the meringue to break down.
Browned Meringue
This happens when the oven temperature is too high. Meringue cookies should remain white or very lightly coloured. Solution: Always use an oven thermometer to ensure your oven is at the correct low temperature (200°F / 95°C).
General Tips for Meringue Success:
- Cleanliness is Godliness: Seriously, spotless bowls and whisks are non-negotiable.
- Patience is Key: Don't rush the whipping process, and allow ample time for the low-temperature bake and cooling.
- Trust Your Oven: An oven thermometer is your best friend for precise temperature control.
Conclusion
Melt-in-your-mouth Perfect Meringue Cookies: Your Easy Guide to Light & Crispy Bites are a testament to the fact that baking can be both simple and incredibly rewarding. With just a few basic ingredients and a good understanding of technique, you can create these ethereal "sugar clouds" that are sure to impress. Whether you're looking for a naturally gluten-free dessert, a light-as-air treat, or a beautiful addition to your holiday spread, meringue cookies offer versatility, elegance, and an unforgettable melt-in-your-mouth experience. So, roll up your sleeves, embrace the low-and-slow baking method, and prepare to delight your taste buds with these truly magical confections!
